CCNA – Dynagen / Dynamips Setup
This post is a set of my notes on Dynagen setup. Dynagen is a text-only frontend to the kewl Dynamips software emulation for Cisco router for use when studying for exams or whenever you need to emulate a router. You can also use this article to set your idle-pc value and reduce CPU usage from the Dynamips server.
First, there is an excellent tool GNS3 which is a GUI front-end to Dynagen and Dynamips. However, I failed getting GNS3 to run on my system, and I’m too much in a hurry to track that down. So went down to Dynagen because I roll in text-only command lines, guys…but many links still have the old *non-functional* “dynagen.org” Web site – but that one does not work. I found Dynagen at this SourceForge site or you can just download the GNS3 sources containing Dynamips and get Dynagen from that distro. But this post leads you thru setting up Dynagen / Dynamips without any need for GNS3.
Prerequisites
For the best possible experience, please start by downloading / installing the following packages:
- WinPCap. Put WinPCap on before mucking with anything else. It worked fine on my crummy Win7 laptop. You must have WinPCap to run Dynamips/Dynagen.
- Microsoft Network Monitor 3.4. Netmon is a great tool for capturing the network traffic on your local machine. Get it setup and you can follow along with any of the labs and look closely at the handshaking / communications that go to make up a successful routing system.
Installation
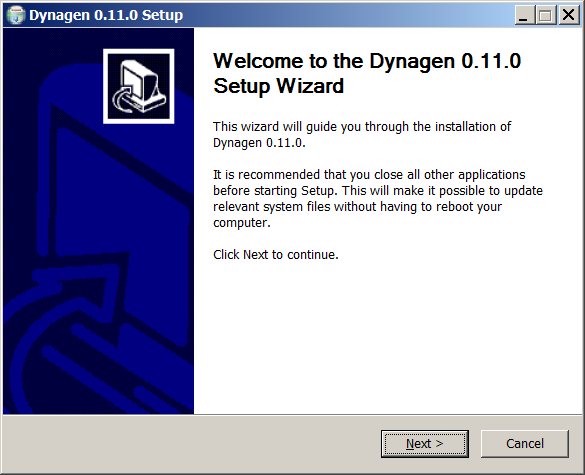
You can get Dynagen (and the embedded Dynamips) from Dynagen SourceForge site and there is a nice Windows installer you can download directly. (Note: The link takes you to a page specifying a .tar.gz file, but the actual download is really a Windows install.) I downloaded and ran the installer, which on my x64 box put everything into C:\Program Files (x86)\Dynamips. (On a 32-bit machine this will be simply C:\Program Files\Dynamips.) The following shows the installer start:
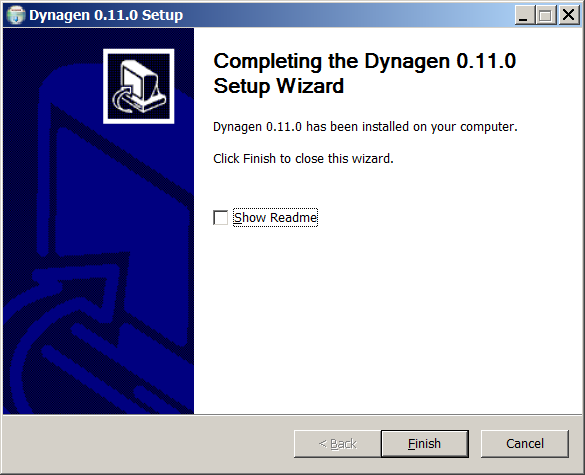
For completeness here is the finished install:
Now you are ready to start some labs.
Some Explanation on Dynagen, Dynamips, and Cisco IOS Images
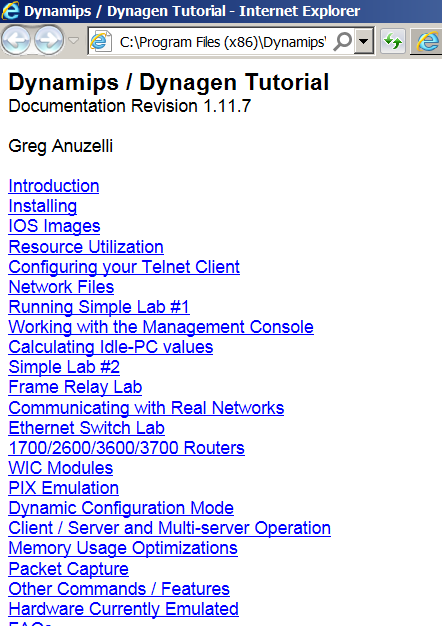
Dynagen comes with a nice tutorial as part of the installed package. It is located in %ProgramFiles%\Dynamips (%ProgramFiles(x86)%\Dynamips on 64-bit machines) in the docs folder named (appropriately enough) tutorial.htm. Just click on it and you’ll get the tutorial as shown:
The only problem with the tutorial is that it doesn’t document everything that you need in one easy-to-use section, and some of the additional parameters you can set aren’t mentioned at all in the tutorial. So let’s go through some underlying concepts:
- Cisco IOS Image. To run any lab using Dynagen / Dynamips, you’ll need a Cisco IOS “image” file. Most any Cisco
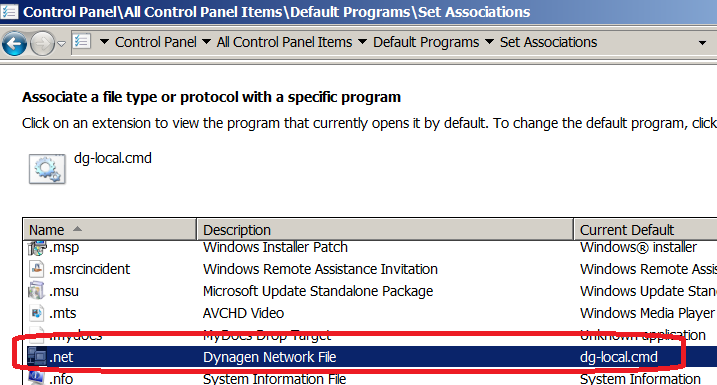
.binIOS image that physical Cisco switches / routers can load can be used. While we can’t provide these images to you here (they are proprietary to Cisco) you can download one from the Cisco Web site. For our purposes we are using thec3640-ik9o3s-mz.124-25d.binIOS image. The name indicates this is for a Cisco 3640 router and is version 12.4 release 25d; the Cisco 3600 series routers were commonly used as WAN distribution routers in the 1990’s and into the early 2000’s. Three main models existed: 3620, 3640, and 3660, with the 3rd digit identifying the number of Network Module (NM) slots (2, 4, or 6, respectively). The 3640 happens to support later IOS versions than do the 3620 and 3660, making the 3640 in particular have some appeal as a used router for Cisco exam preparation. It also supports MPLS VPNs as both Provider (P) and Provider Edge (PE) router. Theik9o3s-mzindicates the feature set (IP support (i), strong 3DES/AES encryption (k9), IOS Firewall/Intrusion Detection (o3), and IP Plus support (s)) and the image location (“m” for RAM in this case) and compression (“z” for ZIP format for this image); see this www.freeccnaworkbook.com reference for more explanation. And be sure to spend some time reading up on the reference…this is exactly the kind of trivia you’ll be expected to know for the CCNA. - .NET files. The Dynagen installer automatically associates .NET files with the installed
dg-local.cmd(located in the Dynagen install folder) as shown below.
The .NET files are simple text documents containing configuration parameters to describe a lab setup for Dynagen to emulate. We’ll setup a sample .NET file in just a bit. - Dynamips server. Prior to double-clicking on any .NET file, you’ll need to start the Dynamips router emulation server. This is the kewl program written by Fabien Devaux, Christophe Fillot (cf@utc.fr), and MtvE back in 2006. This is the program that will actually load and run the Cisco IOS image you downloaded and specified your
.NET file.
With these explanations out of the way, let’s discuss our file / folder setup.
Dynagen Lab Organization
We have found that the key to a successful Dynagen lab experience is careful setup of the lab environments. Typically you will have *hundreds* of labs as you prepare for the CCNA tests and you want to keep those labs separate and easy to work with. Here’s our approach for files and folders:
- Keep ’em separate. Each Dynagen lab should be separate from all other labs. This means you have a known folder structure in place. For our setup, we chose a top-level folder of
C:\CCNA\Labswith a structure for our Cisco IOS images as well as a separate folder for each lab:C:\CCNA\Labs>dir Volume in drive C is OSDisk Volume Serial Number is 6CE5-A94B Directory of C:\CCNA\Labs 03/25/2014 10:16 AM <DIR> . 03/25/2014 10:16 AM <DIR> .. 03/25/2014 10:16 AM <DIR> 00-FirstLab 03/25/2014 10:16 AM <DIR> 99-Images 0 File(s) 0 bytes 4 Dir(s) 47,562,432,512 bytes free C:\CCNA\Labs> - Centralize your IOS images. Each lab can reference a common Cisco IOS image; there’s no need to have multiple copies of the same image file. We have the
99-Imagesfor our downloaded images and here they are:C:\CCNA\Labs\99-Images>dir Volume in drive C is OSDisk Volume Serial Number is 6CE5-A94B Directory of C:\CCNA\Labs\99-Images 03/25/2014 10:22 AM <DIR> . 03/25/2014 10:22 AM <DIR> .. 03/25/2014 09:57 AM 32,526,944 c3640-ik9o3s-mz.124-25b.bin 03/25/2014 09:59 AM 32,484,576 c3640-ik9o3s-mz.124-25d.bin 2 File(s) 65,011,520 bytes 2 Dir(s) 47,495,462,912 bytes freeWe will indicate in our
.NET fileswhich image we want to use; more on that later. - Keep your labs nice and tidy. The following shows our
00-FirstLabwith a single entry…our.NET file. Each new lab you create should start with this same clean structure…as you’ll discover, you will get a *lot* more files in this folder as the lab runs 🙂
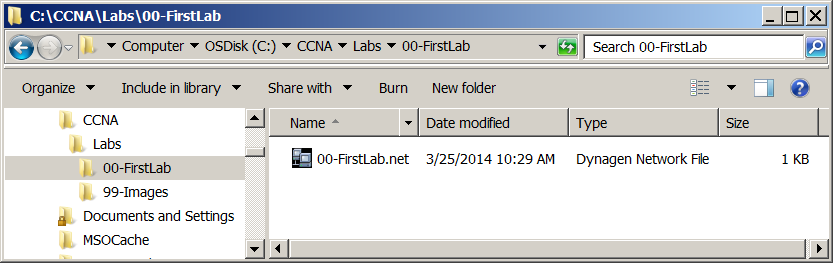
The above picture shows that we have named our
.NET fileto match our folder name (00-FirstLab.net). This helps us to know exactly which lab a particular.NET filebelongs to and will be a great relief when we have created tons of these labs.
At this point we have our software downloaded and and our folder structure setup…but you might be concerned that you don’t know what to put in that 00-FirstLab.net file. Have no fear, that’s coming up soon!
Fixup the Dynamips dynamips-start.cmd
There’s one other thing we like to do before diving into labs…we like to modify the default dynamips-start.cmd within the installed Dynamips folder. Here’s the original file:
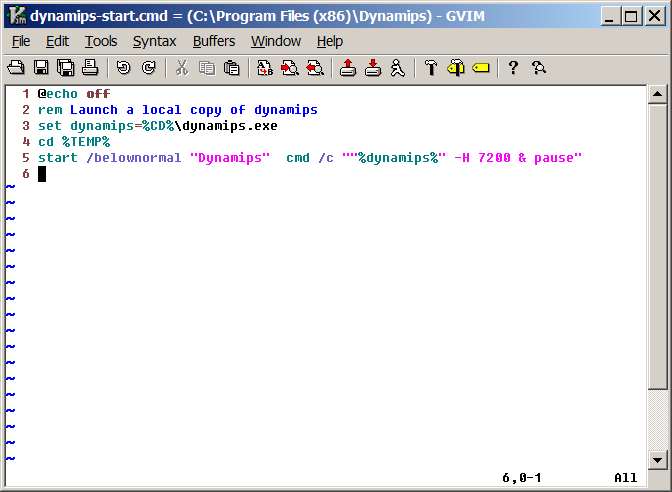
There’s one thing we don’t like about this setup: it assumes that the starting folder is the Dynamips installation (the set dynamips=%CD%\dynamips.exe line). Let’s fix that assumption so that we tell Dynamips exactly where it was installed:
@echo off
rem Launch a local copy of dynamips
set dynamips=C:\Program Files (x86)\Dynamips\dynamips.exe
cd %TEMP%
start /belownormal "Dynamips"  cmd /c ""%dynamips%" -H 7200 & pause"
There! We’ve told Dynamips exactly where to look for itself and now we are ready to move on.
Your First Dynagen Lab
The Dynagen system works by reading the text-based .NET file, which we by now have in our dedicated project directory. So let’s get this file built…we’ve presented our sample file below:
# 00-FirstLab

[localhost:7200]
     autostart = false
     workingdir = C:\CCNA\Labs\00-FirstLab
     udp = 50000

     # 3640 section
     [[3640]]
          image = C:\CCNA\Labs\99-Images\c3640-ik9o3s-mz.124-25d.bin
          ram = 128
          disk0 = 0
          disk1 = 0
          mmap = True
          ghostios = True
          sparsemem = True
          #idlepc = 0x60290f00

     # first router
     [[ROUTER R1]]
          model = 3640
          console = 50001
We’ll cover each element below, but first keep in mind that the tutorial covers some of these elements. Check that first if you have additional questions:
# 00-FirstLab- Each line starting with a “#” is a comment. We start our file with its name.
[localhost:7200]- Each line starting with an open bracket “[” indicates a virtual server along with a port number. In this case we’re defining how we connect to the Dynamips server we will run on our local system “localhost”.
autostart = false- This is a flag that controls how the emulated routers defined within this section should be started. If we have
autostart = truethen all of the routers would be started as soon as the .NET file was executed by Dynamips. workingdir = C:\CCNA\Labs\00-FirstLab- This is the location where all work files should be written. A bunch of files will end up here; our convention is to put each Dynagen lab into its own folder so the files don’t overwrite each other.
udp = 50000- This is the port number which will be used to send all Network I/O (NIO) traffic between interfaces. Start it at any number 10000 or higher; we chose to start at 50000 and to base the value on the location in the CCNA guide. For example, Chapter 3 / Lab 2 would have a value of 50302 while Chapter 10 / Lab 6 would be 51006. This ensures that multiple labs from different chapters could be run simultaneously without one impacting the other.
[[3640]]- Dynamips supports numerous types of Cisco routers and switches. This line indicates that we are providing configuration for the 3640 router. All lines in this section are for the 3640.
image = C:\CCNA\Labs\99-Images\c3640-ik9o3s-mz.124-25d.bin- This is the physical disk location for the downloaded Cisco IOS image we are using.
ram = 128- Amount of RAM to give to the 3640 router. 128MB is a good value.
disk0 = 0anddisk1 = 0- Both
disk0anddisk1refer to Flash Disks in PC Card slots 0 and 1, respectively. Here you can give an explicit size to them; we leave them at the default by using zero. mmap = True- Tells Dynamips to use memory mapping; basically, use virtual memory when processing the IOS images. If you have plenty of memory, set it to
false. ghostios = Trueandsparsemem = True- Can significantly reduce the amount of real host RAM needed for labs with multiple routers running the same IOS image.
#idlepc = 0x60290f00- By default, Dynamips will burn all CPU but you can set the
idlepcas documented in the tutorial to cut down the CPU cycles.
[[ROUTER R1]]- Begins a section for a named router device (“R1” is the name). All the lines in this section configure the router.
model = 3640- Identifies the model number, which will correspond to a device section such as the
[[3640]]we defined above.
console = 50001- Allows a console to be opened for connection to the running emulated router. Our convention is to keep every port number unique.
There are lots more options that can be set; see our entry on “frame switches” for additional details.
Running the First Lab
The .NET file by itself contains enough information to get the job done…remember that if you use the Windows Installer to setup Dynagen/Dynamips then the .NET file extension is associated with dg-local.cmd in the Dynamips installation folder.
To run the first lab, follow these steps:
- Start Dynamips Server. Double-click
dynamips-start.cmdWithin the Dynamips installation folder *or* the “Dynamips Server” icon from your Windows desktop. They do the same thing; start the Dynamips server on port 7200. See the shot below, which shows what happens on a hardened Windows Server 2008 R2 box when the Dynamips server is first run:
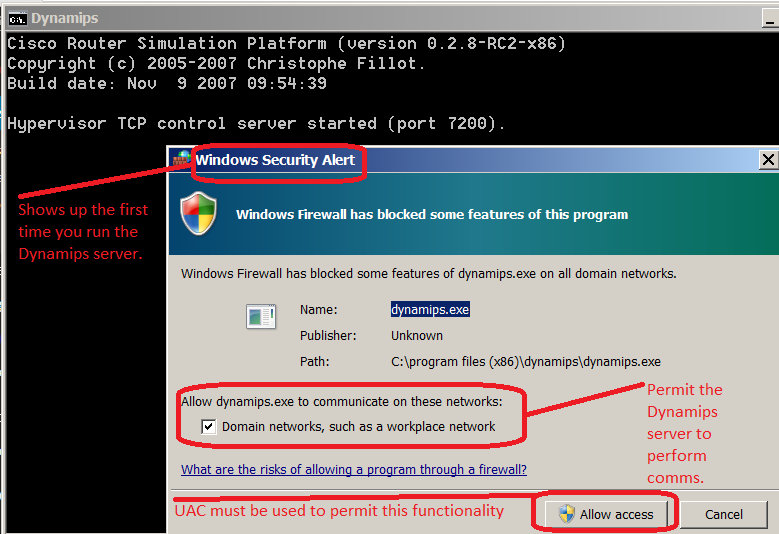
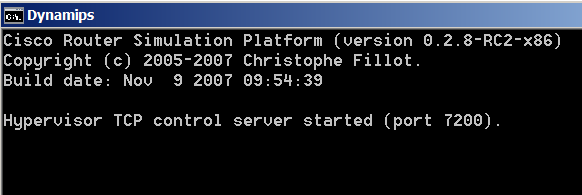
Note that you must explicitly permit the Dynamips server to perform network communications if you have Windows Firewall set to automatically prompt when new programs attempt a connection. By accepting the prompt, you add an exception to the firewall rules for Dynamips. The running Dynamips server looks like the following:
- Start the
.NET file. Assuming that you have your.NET fileassociated with thedg-local.cmdfrom the Dynamips install folder, just double-click the.NET filefor the first lab00-FirstLab.net. When you do, a new window appears as shown below:
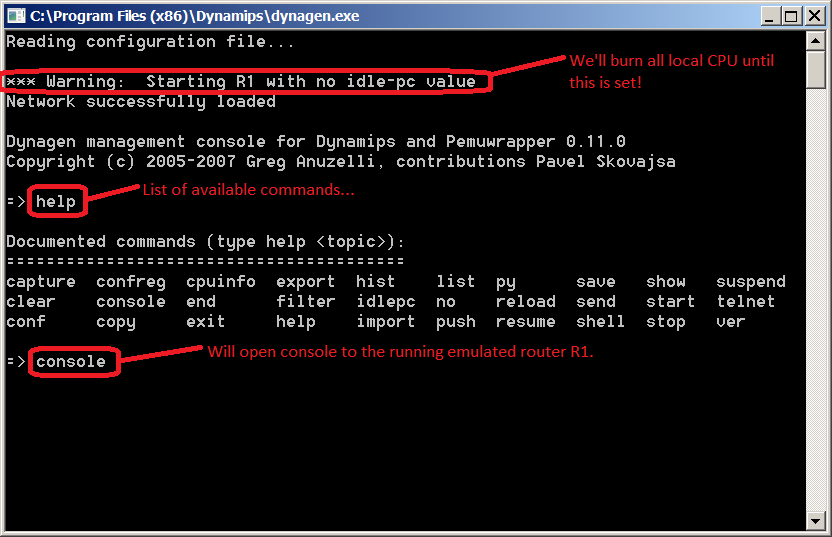
Take a look at the above screen. First, you an see that the virtual router
R1was started when we double-clicked the.NET file. Second, you can see we don’t have theidle-pcvalue set…so we’re burning all CPU. Take a look at the next screenshot:
We’ll solve
idle-pclater; from the first screenshot you can see that a list of commands are available. You can start and stop the router(s) defined within the.NET file, and we also show how you open a console to the running router. So let’s continue to that now. - Your first virtual console session. You open a router console for our first lab by using the
console R1command. Now…this may not work as Telnet client may not be installed:
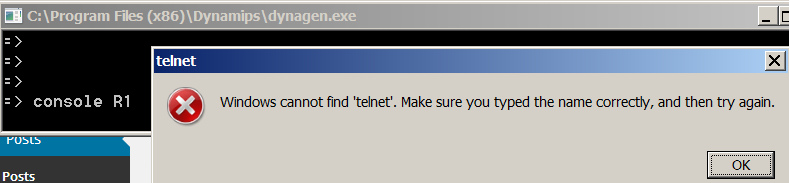
The fix for this is easy as long as you are an administrator; see Microsoft’s post on enabling Telnet which basically comes down to running
pkgmgr /iu:"TelnetClient"from an Administrative command prompt. Note: If you still run into the error after enabling Telnet, you can get to the console. Just run the same command as Dynagen is doing. For our lab, here’s the detailed command:c:\windows\system32\cmd.exe /c start telnet localhost 50001That started the console, which should resemble this if you open the console while the virtual router is booting:
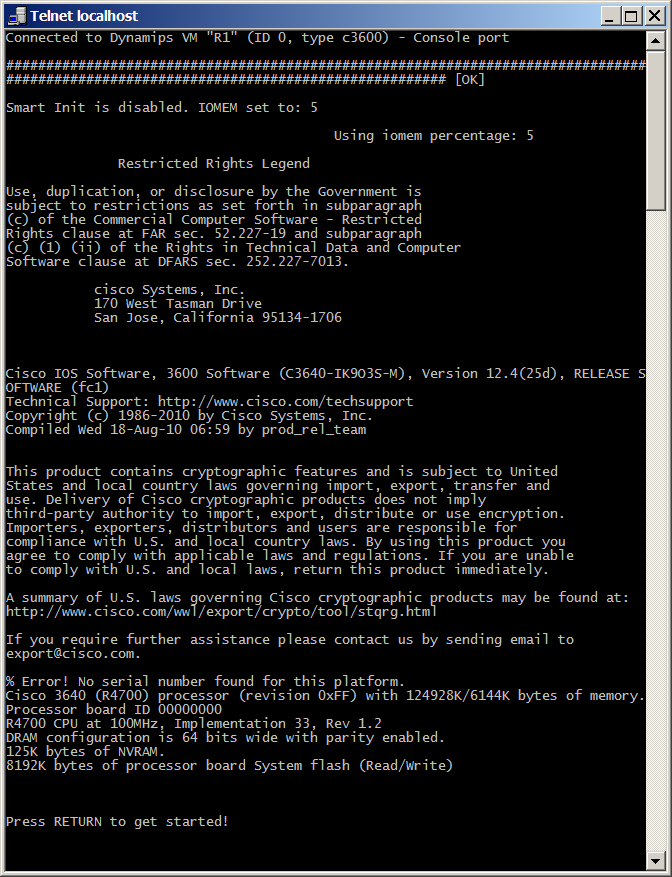
Is that kewl or what? We have a fully-booted Cisco 3640 router running. After we press RETURN we will get the normal router prompts.
idle-pcfix. Remember that right now we are burning all of our CPU for this virtual router. Now imagine that we have four or five of these routers running (not at all unusual with some of the more complex labs for the CCNA). That’s a lot of CPU contention! So to fix it, we follow the instructions in the Dynagen Tutorial, which boil down to this:- Start a lab with a single router. We just did that.
- Wait for the router to initialize and quiesce. Basically, wait for a minute or so (which we have just done).
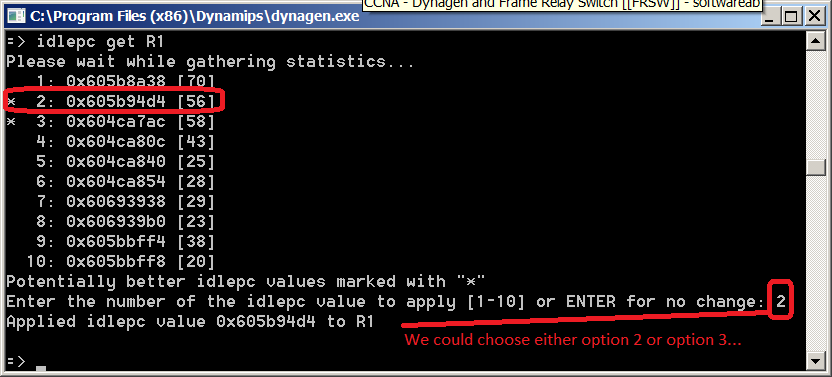
- Calculate the
idle-pcvalues. Within the Dynagen console, run the commandidlepc get R1(using our example with a single router namedR1and you’ll get a screen listing all calculatedidle-pcvalues. Note in the following shot we selected option 2, although either option 2 or 3 would have been fine.
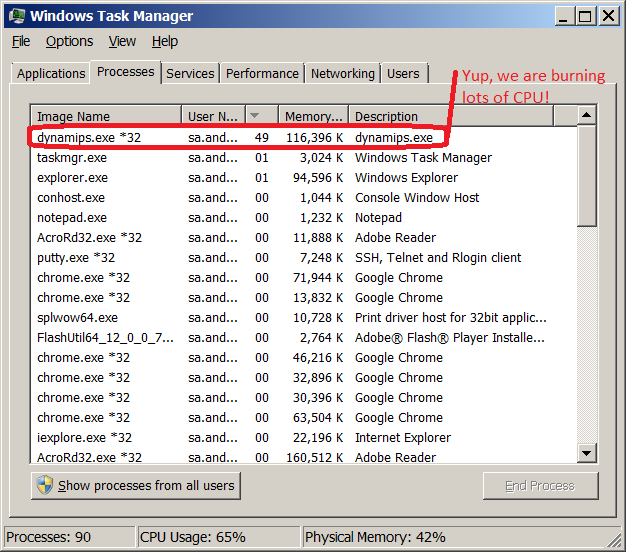
- Verify that CPU usage is reduced. In the following screenshot we see that CPU usage for
dynamips.exeis now back down to 6%…much better than the 49% it was at (an entire CPU in our dual-core server).

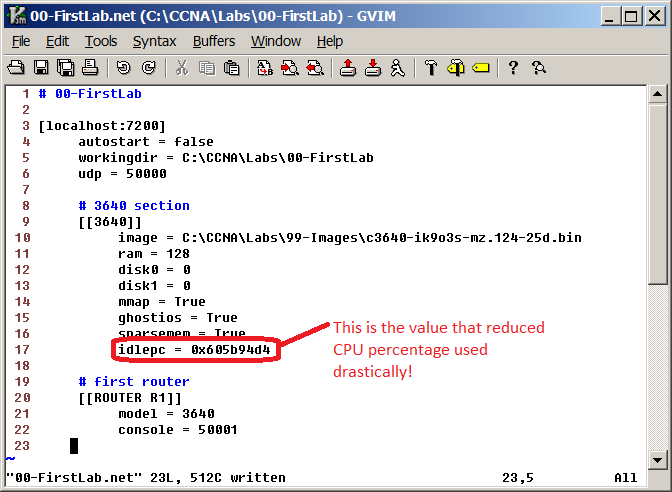
- Save the
idle-pcvalue. After verifying CPU usage is reduced, you can either use theidlepc save R1 dbto save the value permanently, or you may update the.NET filewith the explicit value. We took that approach and show the result below:
That should be it for setting
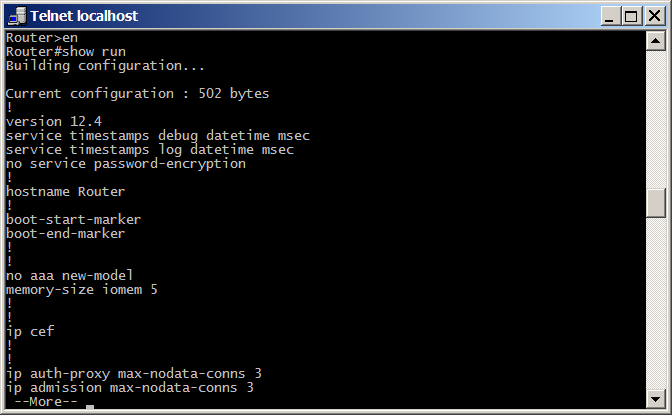
idle-pc.- Configure that Router! At this point, you have a working system that emulates a single Cisco 3640 router using the loaded IOS image. Now you can configure that virtual router just as you would a “real” router. For example, the following shot shows us entering enhanced mode (
encommand) and then displaying the current configuration (show runcommand).
We won’t guide you anymore through this process, but you can feel empowered by getting your environment setup correctly. - Looking at the generated files. Remember how we emphasized putting each Dynagen lab in its own folder? Let’s take a look at that folder now:
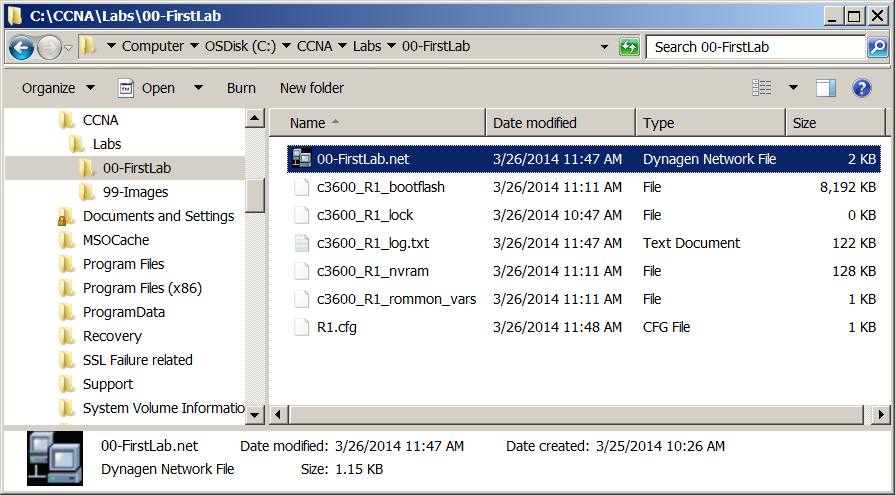
Here’s what the individual files mean:- c3600_R1_bootflash – This is the 8MB file containing the flash memory image based on loading the IOS image.
- c3600_R1_lock – This is a internally-maintained file that Dynagen uses to manage access to the file (indicates a console is open).
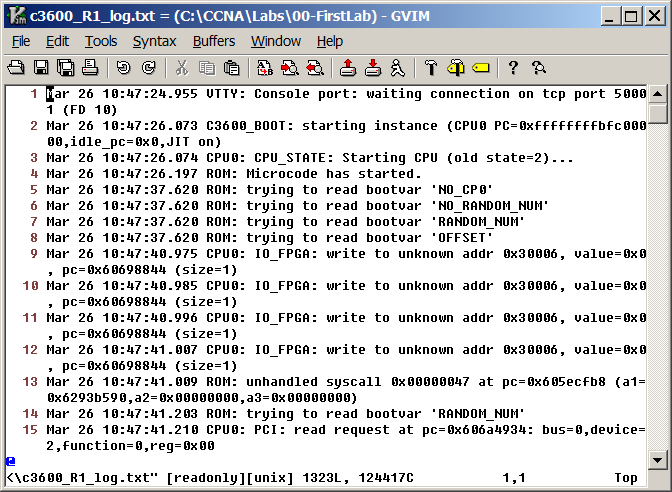
- c3600_R1_log.txt – This is the Cisco router log file; see the following shot:
- c3600_R1_nvram – This contains the non-volatile RAM; basically, it has
startup-configwithin it. - c3600_R1_rommon_vars – This file contains variables used within the Cisco ROM Monitor mode; see the Cisco ROM Monitor Article for more information.
- R1.cfg – This is an extra; it’s the
running-configfrom theR1router. We created it by using theexport R1 .command from the Dynagen console.
Now you can see why we put each lab in its own folder…image if you had a single folder for multiple labs and your files were overwriting each other all over the place!
What’s Next?
Check back in with us as we document our journey through the CCNA certification. We’ll have lots of solid, in-depth, and useful articles on our findings that will help you in your own journey.
Happy Computing!
Team-oriented systems mentor with deep knowledge of numerous software methodologies, technologies, languages, and operating systems. Excited about turning emerging technology into working production-ready systems. Focused on moving software teams to a higher level of world-class application development. Specialties:Software analysis and development...Product management through the entire lifecycle...Discrete product integration specialist!
Leave a Reply