An E-Z MiniShift Environment
We just created a new GitHub project to run MiniShift – the easy-to-use and easy-to-configure OpenShift environment you can run locally. Read on to see why we made this project and how it can help you.
Where is the Code?? Just want to get the code and bang around on it? Don’t blame you! Use this link to get to our supporting GitHub project.
Why? The Mac Dilemma for MiniShift
The driving factor behind this effort was to provide better support for MiniShift running on Mac OSx. The problem is that MiniShift actually runs as a Docker-in-Docker solution on the Mac (as well as on Windows). This is vexing because we already run a native Docker for Mac; the problems are threefold:
- Why have two Dockers? – Basically, why even use two separate Docker instances?
- Running
dockerbecomes ambiguous – When we run the thedockercommand, which Docker will be executed? - How to Access the Docker running Minishift – In other words, if you want to run a command directly on the Docker VM, how can you do so when Docker itself is hidden behind your Minishift deployment?
As we said–a vexing set of problems. Let us tackle them individually, shall we?
The Case of the Multiple Dockers
Our solution – at least today – does not address Vexing Problem #1 – Why have two Dockers?. But we came very close to solving it 🙂
Basically, remember that MiniShift is nothing more than a basic OpenShift installed on top of a single-node Kubernetes deployment. When you deploy MiniShift, you are actually creating a Kubernetes environment – and that Kubernetes environment requires a container management system. By default (and the most common solution), this Kubernetes will use an already-present Docker installation. So…all MiniShift is doing is:
- Install a local Docker
- Deploy a local Kubernetes on top of that Docker
- Install OpenShift command-line tools and configure the Kubernetes environment to run OpenShift
Thus, if one already has a local Docker (check!), and one has a local Kubernetes environment already created (check check!), then one should be able to deploy a full OpenShift on top of that environment relatively easily.
Except one cannot. Sadly, as this post highlights, one must install OpenShift on a “built-in” Kubernetes. Which was quite sad, especially since the Kube-for-Mac project that runs Kubernetes natively on top of the Docker already on the Mac (and to which we contribute heavily) would have allowed us to run an entire OpenShift on our local MacBook Pro.
So what does this have to do with MiniShift? Quite a lot…since we did not crack the code to get OpenShift running on our own Kubernetes (thus, on the locally-installed Docker), we had to settle for running on an OpenShift-deployed Docker / Kubernetes. And the easiest way to do this is by using MiniShift – which will install a helper VM to run a reserved Docker instance and will then install Kubernetes on top of that Docker.
In short – we have to accept that at least two Docker instances will be running. And we wanted an easy way to handle that from the command line, which led us to create this project.
Running an Isolated MiniShift Environment
OK – so we aren’t directly addressing our vexing two problems (“Running docker becomes ambiguous” and “How to Access the Docker running Minishift directly”). But, if you read on you will see that we hit both of those topics – as well as others.
By this point we have learned that we are going to require a dedicated Docker / Kubernetes environment to run OpenShift, and MiniShift is a great, simple way to do this. But we want to use MiniShift in such a way that we never interfere with our “native” Docker installation. Furthermore, since we also run Kubernetes for Mac locally – it’s quite possible that at any given time we’ll have Kubernetes up and running – and this Kubernetes is completely independent of the MiniShift / OpenShift environment we want to install.
That is where our code project comes into play. You simply clone our MiniShift GitHub project, verify a few prerequisites, and you should be able to install, configure, and use MiniShift without any impact either from or to any other Docker / Kubernetes environments you have locally installed.
1. Get Ready…
From a shell, clone the project:
git clone https://github.com/andybrucenet/sab-minishift.git
Review the README and verify you have the prerequisites installed.
2. Get Set…
Still in your shell, startup the environment:
./scripts/build-utils.sh up
This configures your local MiniShift environment and starts everything up. Here is some sample output:
***Build project...
Start MiniShift...
-- Checking if xhyve driver is installed ...
   Driver is available at /usr/local/bin/docker-machine-driver-xhyve
   Checking for setuid bit ... OK
-- Starting local OpenShift cluster using 'xhyve' hypervisor ...
-- Minishift VM will be configured with ...
   Memory:    2 GB
   vCPUs :    2
   Disk size: 20 GB

   Downloading ISO
[...much cruft ensues...]
The server is accessible via web console at:
    https://192.168.64.2:8443

You are logged in as:
    User:     developer
    Password:

To login as administrator:
    oc login -u system:admin
3. Go!
At this point, you should have a complete MiniShift / OpenShift environment. To access, you can use the command line or the browser.
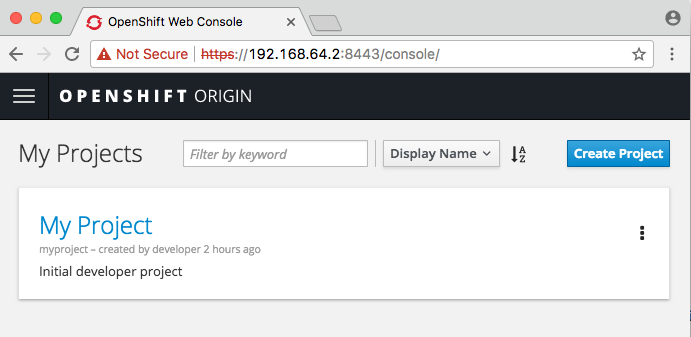
Access MiniShift via Browser
- The browser should be Chrome or Firefox. For sure, Safari does not work.
- Open https://192.168.64.2:8443 (check this against the address output by
./scripts/build-utils.sh upabove.) - Click through any of the “Your connection is not private” error screens; you will get these because MiniShift creates its own local Certificate Authority that results in these screens.
- Login to the OpenShift console; use
developeras the Username and anything you want as the password (it just cannot be an empty password). - You should see the result:

OpenShift Console
Access MiniShift via Command Line
This one is simpler: simply use our wrapper functions:
./scripts/build-utils.sh minishift oc [...oc command arguments...]
Here’s an example:
MacBook-Pro:sab-minishift l.abruce$ ./scripts/build-utils.sh minishift oc get project
NAME        DISPLAY NAME   STATUS
myproject   My Project     Active
Please see the project README for more details and examples.
Access MiniShift Docker VM
The third question we had was: how to access the VM running Docker that MiniShift creates? You may want to do this if you need to setup shares to your local disk, take actions on the actual Docker engine…for example, our Kubernetes-for-Mac fork does a lot to Docker under the covers, and you never know if you may need the same access.
Our approach is simplicity itself: we simply run a Docker container that mounts the Docker Engine on its local host. In the case where Docker is running as a VM, this means the Docker Engine’s local host is the running VM.
Here’s how to access a shell on the MiniShift-created VM running Docker:
./scripts/build-utils.sh minishift-docker sh
Here’s another example to list the network interfaces:
./scripts/build-utils.sh minishift-docker ip a show
That is all for now; please check out the project for more information.
Team-oriented systems mentor with deep knowledge of numerous software methodologies, technologies, languages, and operating systems. Excited about turning emerging technology into working production-ready systems. Focused on moving software teams to a higher level of world-class application development. Specialties:Software analysis and development...Product management through the entire lifecycle...Discrete product integration specialist!
Leave a Reply