Symantec LiveUpdate Server Configuration
Symantec Endpoint Protection (SEP) depends on having up-to-date virus signatures pushed automatically from a centralized location. This article shows how we solved this requirement by creating a local Symantec LiveUpdate Server within our lab environment.
In this paper, we specifically document the *differences* between our install and the standard “Next-Next-Next” Symantec LiveUpdate Server install.
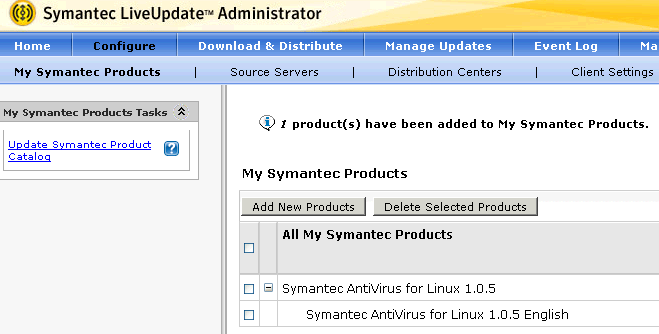
- Added only Symantec AntiVirus for Linux on the target server. We actually used our existing WSUS server!
- Setup IIS to be the “Distribution Center” that clients can access. Found reference http://www.symantec.com/business/support/index?page=content&id=TECH132545 which is specific to Windows Server 2008 and IIS 7. (Server 2008 R2 is similar but has its own page and also includes WebDAV as installable Role Service.) Follow steps below:
- IIS Role Services: Both “Basic Authentication” and “Directory Browsing” must be installed. Also, for troubleshooting be sure to install the following from Health and Diagnostics section of IIS Role Services: “HTTP Logging”, “Logging Tools”, “Request Monitor”, and “Tracing”. Restart the server after installation to be sure that all files and services created OK.
- Provide new IP so that new Web site can be created (172.24.4.68). Do not use the default Web site as that is reserved for WSUS. Update DNS to use name “symav-lua.armycloud.cloud.army.mil”.
- Create new AD group “SymAV” with a user “lua”.
- Webdav installed from Microsoft download as documented. (Server 2008 R2 IIS 7.5 would already have this as an installable IIS Role Service.)
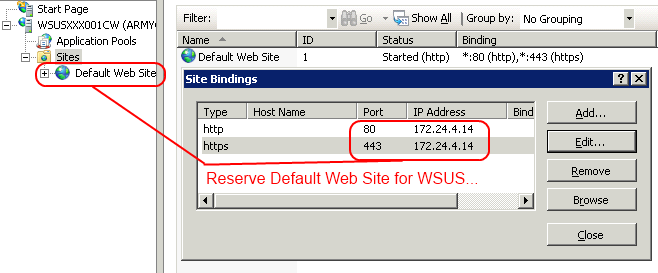
- Be sure to bind the Default Web Site to the original WSUS IP (172.24.4.14) so that it will not conflict with Symantec AV:
- Create server certificate for symav-lua.armycloud.cloud.army.mil using the standalone certificate authority.
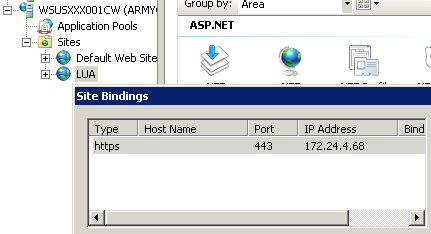
- Create new Web site named “LUA” and bind to the dedicated IP using only https as shown below. Assign the symav-lua.armycloud.cloud.army.mil signed by the standalone CA as shown:
- Symantec instructions on configuring the Web site work as documented other than the above. When complete, test the install by opening https://symav-lua.armycloud.cloud.army.mil and verify you are prompted for username / password.
- Configure the LiveUpdate Administrator. This is not difficult so just the salient points mentioned here:
- Configure -> Source Servers – The default Symantec LiveUpdate HTTP works fine. The FTP site is unreachable (FTP not allowed) but that is OK.
- Configure -> Distribution Centers – Create one named “LUA_IIS” with a single location (also named LUA_IIS) that references https://symav-lua.armycloud.cloud.army.mil:443/.
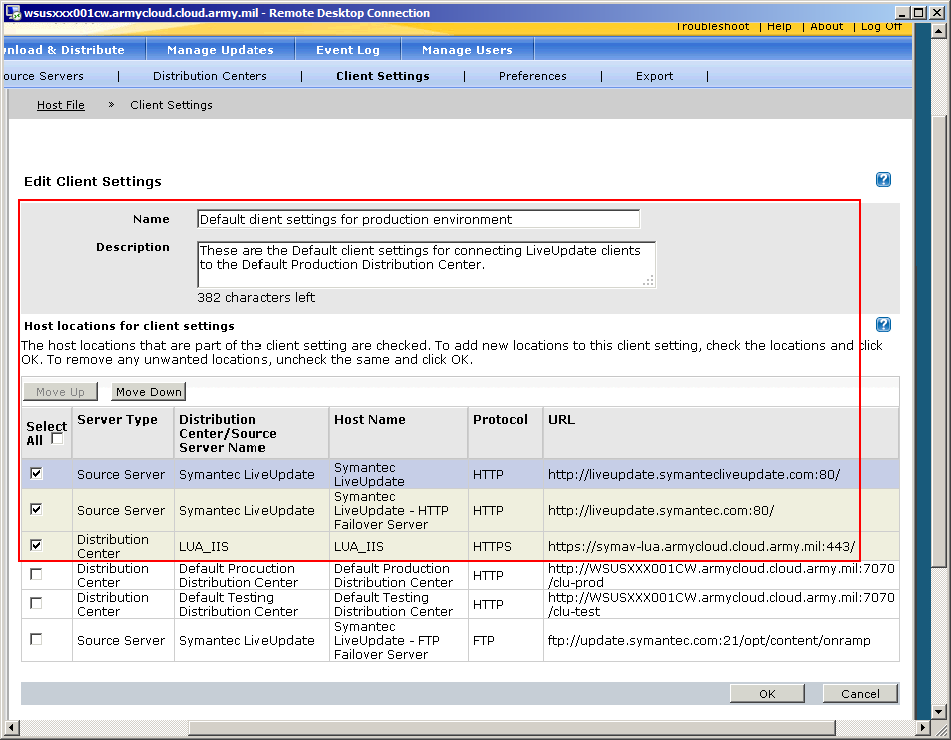
- Configure -> Client Settings – Modify the “Default client settings for production environment” so that the Source Servers have only the Symantec LiveUpdate (via HTTP) and the “Distribution Center” server is simply the LUA_IIS. See shot:
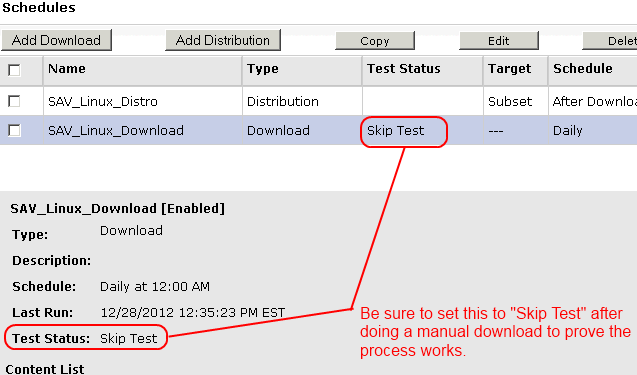
- Under “Download & Distribute” tab, create two schedules. Both schedules should apply to the “Symantec AntiVirus for Linux” product. SAV_Linux_Distro is a “Distribution” schedule and should be created first; set it to run “After Download” and for it to use the LUA_IIS distribution center created above. Then create a “Download” schedule named SAV_Linux_Download and set it to use the “Must Test” test status and to execute the SAV_Linux_Distro distribution schedule after the download completes. See following shot:

- Start the process by running the SAV_Linux_Download schedule. It will locate all Linux antivirus files and pull them to the download folder. You can see the results by going to Download & Distribute -> Activity Monitor as shown in the shot below:

- The “Must Test” attribute above has the side effect of forcing the administrator to go into the “Manage Updates” tab and setting the status of the download to “Passed” before it gets distributed to the distribution center. See shot below:
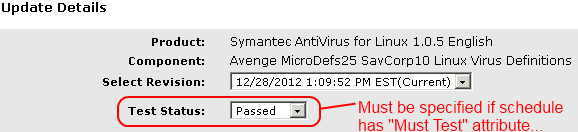
For manual downloads such as the previous step, this is fine. For ongoing production work this approach loses especially for AV signatures. So after performing the first manual download, update the “Test Status” within the SAV_Linux_Download schedule to be “Skip Test” as shown below. Future automatic downloads will thus be distributed without requiring a manual approval.
After doing all of the above and getting Download working, running the SAV_Linux_Distro schedule failed with error 404 (“File not found”) in IIS logs. That is because by default, IIS limits upload sizes to 50K. In fact, the actual HTTP error code is 404.10 (“Request Header is too long”. But you only see the 404 🙂
The Symantec setup conveniently forgets to mention this. Fix it by going into web.config for the LUA distro Web site and adding:
<system.webServer>
        <security>
            <requestFiltering>
                <requestLimits maxAllowedContentLength="262144000"/>
            </requestFiltering>
        </security>
</system.webServer>
That is 250MB (value is in *bytes*). Which is plenty big for all the patches I see (max is around 180MB).
Then you run the distro again from LUA interface and – bam – you get success! See screenshot below:
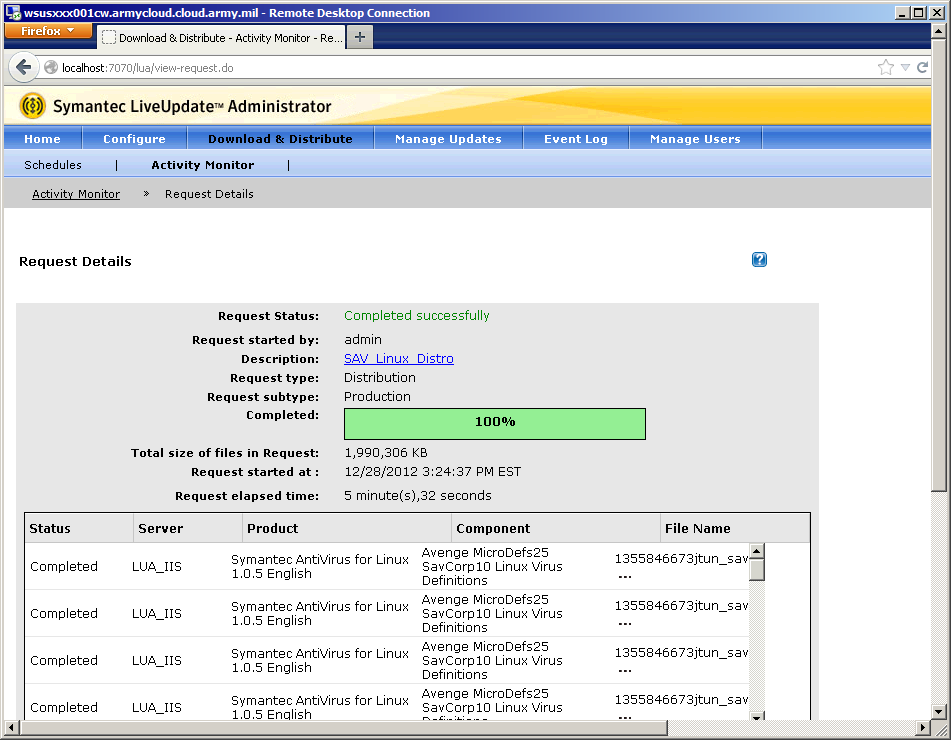
At this point the patches have been downloaded to the LUA server.
And – we hope you get your own LUA server running successfully. Happy Computing!
Team-oriented systems mentor with deep knowledge of numerous software methodologies, technologies, languages, and operating systems. Excited about turning emerging technology into working production-ready systems. Focused on moving software teams to a higher level of world-class application development. Specialties:Software analysis and development...Product management through the entire lifecycle...Discrete product integration specialist!
Leave a Reply